Guides
MiSTer FPGA Starter Kit UK: What You Actually Need
Sep
Building a MiSTer in the UK is easier than most people expect, but the shopping list is longer than the first guide you read suggests. There is a base board, memory, somewhere to plug in a controller, a way to get video out, and something to keep it cool. This guide sets out what you genuinely need, what can wait, and what to skip entirely.
The three parts you cannot skip
Every MiSTer build comes down to three essentials. Get these wrong and nothing else matters.
- The FPGA board. This runs the cores. The classic choice is a Terasic DE10-Nano; the modern alternatives are the Retro Remake MiSTer Pi and QMTECH Cyclone V boards. All three run the same cores, but they differ in price, availability and how they are powered.
- SDRAM. Many cores need it, and a few need the full 128MB. If you buy nothing else beyond the board, buy SDRAM.
- A power supply. A regulated 5V supply with enough current. A phone charger is not a substitute.
Step 1: choose the board
If you want the cheapest route into MiSTer in the UK, the MiSTer Pi versus DE10-Nano comparison covers the trade-offs in detail. The short version: the DE10-Nano is the reference platform with the widest accessory support, while MiSTer Pi and QMTECH boards cost less and are often easier to find, but may need different power adapters and cases.
Either way, budget for the board first and treat everything else as modular. You can add an IO board in six months without replacing anything.
Step 2: SDRAM — how much do you actually need?
A 32MB module covers a large proportion of the library. A 128MB module is required for the heavier arcade cores, some Neo Geo titles and certain computer cores that load large disk images. If you are buying once and do not want to revisit the decision, 128MB is the safer purchase.
Both options are available as an XS v2.2 32MB module and an XS-DS v3.0 128MB module. Our 32MB vs 128MB guide lists which cores fall into each camp.
Step 3: IO board, or no IO board?
An IO board gives you analogue video and audio output, a user port for SNAC adapters, and a fan header. If you are playing on a CRT, or you intend to use original controllers through SNAC, you want one. If you are playing on a modern display over HDMI, you can skip it at first.
- Digital IO Board v1.2 — digital audio and clean I/O for modern displays.
- IO Board A/V Pro v9.2 — analogue video and audio outputs for CRT and scaler setups.
- Analog IO Board v6.1 — the established analogue option.
Browse the full expansion boards range if you want to compare them side by side.
Step 4: controllers and USB
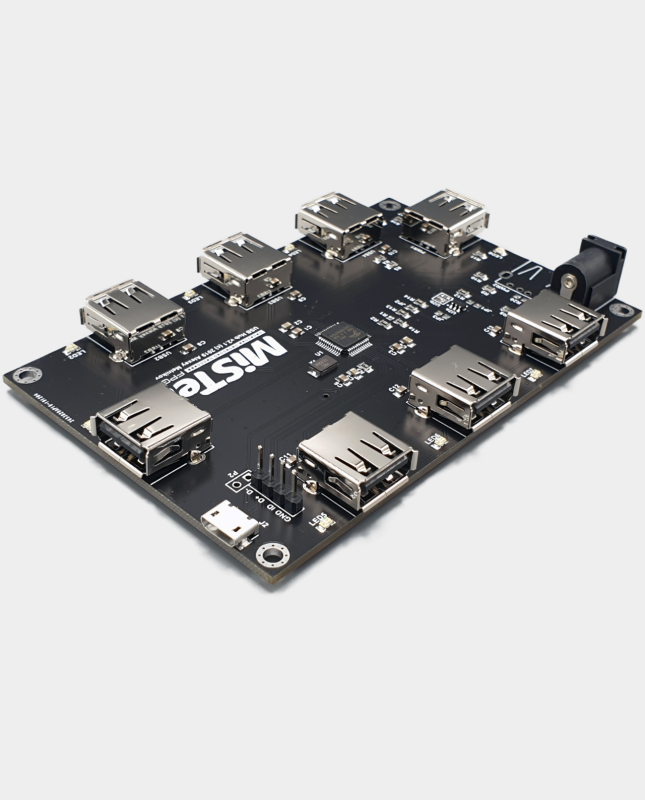
You need a way to plug things in. A USB hub designed for MiSTer handles controllers, keyboards and WiFi adapters without straining the board. If you want original console controllers to behave exactly as they did, SNAC is the low-latency route — our SNAC vs BlisSTer vs USB comparison explains when each makes sense.
Useful starting points:
- USB Hub v2.1 for MiSTer — the standard way to add ports.
- USB bridge (long) or USB bridge (short) — connects the hub to the board.
- BlisSTer Hub Rev.3 — for low-latency original controller support over HDMI-style connectors.
Step 5: cooling
A heatsink is the minimum. A fan is sensible for enclosed cases and warm rooms. The Cyclone V runs warm on the ARM side even when the FPGA is idle, and stability problems in long sessions are often thermal.
- DE10-Nano heatsink — simple passive upgrade.
- Solid copper heatsink — best passive performance.
- Noctua fan — quiet active cooling.
See the cooling and power guide for fan wiring and safe 5V practice.
Step 6: power
A regulated 5V supply with headroom is the right answer. For a DE10-Nano build, a 5V 4A power supply covers a typical setup with WiFi, Bluetooth and controllers attached. If you are powering a MiSTer Pi over USB-C, use the DC to USB-C adapter. In the UK, pair a desktop supply with a UK mains to IEC C13 lead.
What you can safely skip at first
- A case. Nice to have, not essential. An acrylic DE10-Nano case or MiSTer Pi case can come later.
- An RTC board. The RTC board is only worth adding if you care about timestamps in computer cores.
- MT32-Pi. Excellent for DOS-era MIDI music, but a second project rather than a starter item.
- Bare PCBs. Only relevant if you are comfortable soldering.
A realistic UK starter kit
Board, 128MB SDRAM, power supply, heatsink and a USB hub gets you playing on HDMI. Add an IO board and SNAC if you want the analogue and original-controller experience. That is the whole list — everything else is refinement.
Frequently asked questions
How much does a MiSTer build cost in the UK?
It depends almost entirely on the board. A MiSTer Pi or QMTECH board keeps the total down; a DE10-Nano build costs more. SDRAM, power supply and a heatsink are the other unavoidable additions.
Do I need 128MB SDRAM?
Not for most of the library, but you will need it for the heaviest arcade and Neo Geo cores. Buying 128MB once avoids a second purchase.
Can I use a Raspberry Pi power supply?
Only if it delivers a stable regulated 5V at sufficient current with the correct connector. Many phone and Pi chargers are not suitable.
Is a case necessary?
No, but it protects the board from dust and accidental contact. Cooling matters more than the case itself.
Do I need an IO board to use a CRT?
Yes. Analogue video output comes from the IO board. If you only use HDMI, you can skip it.
Ready to build? Start with expansion boards, add cooling, then finish with accessories.
Related reading
Still deciding on part of your build? These guides cover the other choices MiSTer owners face most often.
- How to set up MiSTer FPGA — the step-by-step route from a blank SD card to your first game.
- DE10-Nano vs MiSTer Pi vs QMTECH — which board to build the rest of the kit around.
- MiSTer SDRAM explained: 32MB vs 128MB — how much memory you really need.
- The cheapest way to build a MiSTer in the UK — where to spend and where to save.
