Guides
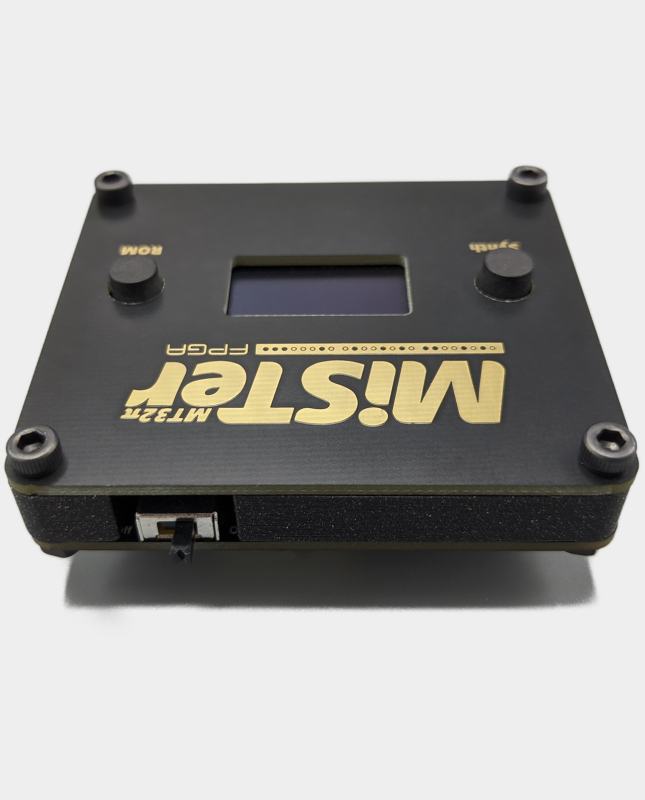
MT32-Pi Guide: MIDI Music on MiSTer FPGA
Sep
If you play DOS-era games, MT32-Pi is the upgrade that changes how they sound. It reproduces the Roland MT-32 and Sound Canvas synthesisers in hardware, so games written for those devices finally sound the way they were meant to.
What MT32-Pi actually does
Many games from the late 1980s and early 1990s were composed for Roland’s MT-32 and later SC-55 synthesisers rather than for the basic AdLib or Sound Blaster cards. When those games run with generic MIDI, the music is recognisably wrong — wrong instruments, missing parts, incorrect balance.
MT32-Pi is a small Raspberry Pi-based add-on that acts as those synthesisers. It connects to the MiSTer, receives MIDI from the core, and outputs the music the composer intended.
What you need
- An MT32-Pi HAT v2.1 — the add-on board itself.
- A Raspberry Pi Zero or compatible board to run the synth software.
- Synthesiser ROM files. These are not included and are your responsibility to source legally.
- A connection to the MiSTer. Often this is straightforward, but check the core’s MIDI output path.
- A MT32-Pi USB cable if your build needs the USB connection between boards.
You also need somewhere to hear it. MT32-Pi outputs audio separately from the MiSTer, so plan for an audio input on your amplifier, monitor or capture device — or mix it back in.
Which games benefit most
MT32-Pi is most rewarding for DOS-era computer cores with period MIDI soundtracks.
- Sierra adventure games. The MT-32 soundtrack is the definitive version.
- LucasArts adventures. Written with Roland devices in mind.
- Westwood and Origin titles. Strong MT-32 support.
- Early 90s flight sims and RPGs. Often composed specifically for Roland hardware.
If you mostly play consoles, MT32-Pi is not for you. If you play DOS games with a keyboard and mouse, it is one of the best upgrades available.
MT-32 versus Sound Canvas
MT32-Pi can emulate both families. The MT-32 is the earlier, more characterful device used by games from the late 80s; the SC-55 Sound Canvas is the General MIDI device that took over in the 90s. Older games usually sound correct on MT-32 emulation, later ones on the Sound Canvas. The Pi can switch between them, so you can match the setting to the game.
Setting it up
- Assemble the HAT onto the Raspberry Pi and place the ROM files where the software expects them.
- Flash the MT32-Pi image to an SD card for the Pi.
- Connect the HAT to the MiSTer. MIDI routing depends on your IO board and core.
- Connect audio out to your amplifier or display.
- In the game or core, select MT-32 or General MIDI output as appropriate.
If your DOS core setup needs help, our setup guide covers the basics, and the expansion boards range covers how the add-on boards attach.
Getting the best from it
- Match the synth mode to the game’s era rather than leaving it on one setting.
- Use a clean audio path — this is analogue output feeding an amplifier, so ground loops are audible.
- Keep the Pi’s SD card backed up once you have the ROMs and settings arranged.
- Pair MT32-Pi with a real time clock board if you want DOS-era timestamps to be correct.
Frequently asked questions
Does MT32-Pi come with the synth ROMs?
No. ROM files are not supplied and must be sourced legally.
Do I need a Raspberry Pi as well as the HAT?
Yes. The HAT is the interface board; the Pi runs the synthesiser software.
Will it improve console game music?
No. It is specific to games that used Roland MIDI synthesisers.
Is it hard to set up?
It is a second-project upgrade rather than a first-day one, but the process is well documented and does not require soldering.
Add MIDI to your build: start with the MT32-Pi HAT v2.1 and the MT32-Pi USB cable.
Related reading
Still deciding on part of your build? These guides cover the other choices MiSTer owners face most often.
- The best MiSTer cores for beginners — including the computer cores MT32-Pi suits.
- How to set up MiSTer FPGA — the basics MT32-Pi builds on.
- MiSTer FPGA power supply: what specs you need — if you are adding boards, check the power budget.
- MiSTer FPGA starter kit UK — what the core build needs first.
