Guides
How to Set Up MiSTer FPGA: SD Card to First Game
Sep
Setting up a MiSTer takes about an hour the first time, and most of that is downloading. This guide walks through the process from a blank SD card to playing your first game, using the standard MiSTer installation script.
What you need before you start
- A MiSTer board (DE10-Nano, MiSTer Pi or QMTECH Cyclone V).
- A microSD card — 8GB is enough to start, 32GB or larger is more comfortable.
- A microSD card reader.
- A regulated 5V power supply. See the cooling and power guide for requirements.
- A USB keyboard, and a controller if you have one.
- A monitor or TV. HDMI works out of the box; a CRT needs an IO board.
SDRAM is not required to complete setup, but many cores will not run without it. If you have not bought any yet, read the 32MB vs 128MB guide first.
Step 1: prepare the SD card
Insert the card into your computer. It needs a single FAT32 partition. Cards 32GB and under usually come formatted this way. Larger cards may need reformatting as FAT32 with a tool such as Rufus on Windows.
Step 2: create the network configuration file
Before writing files, create a small text file called mister.ini on the root of the card. It does not need much to work — the important thing is that it exists so the board can write to it on first boot. The installation script will populate the rest.
Step 3: run the installation script
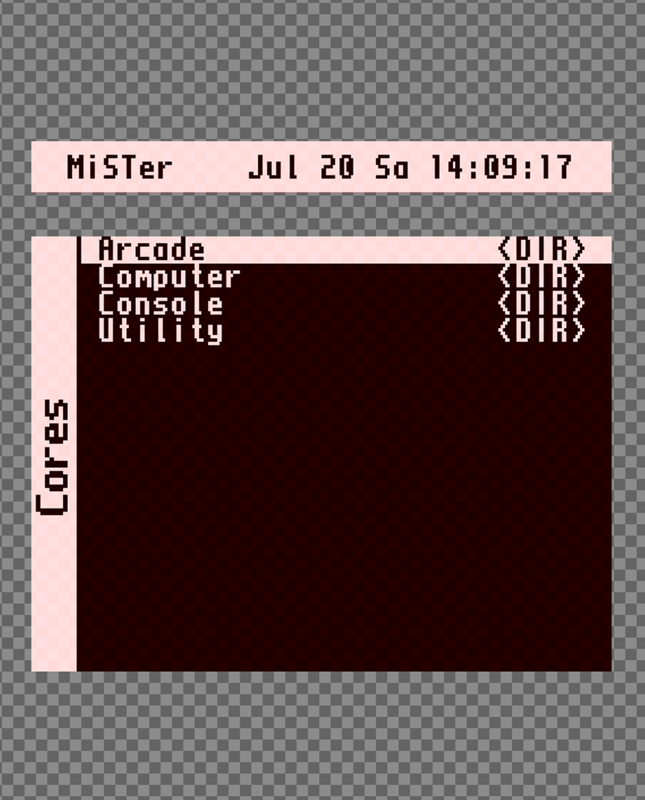
The MiSTer project provides a setup script that downloads the menu core, the main configuration files and the standard folder structure. Copy it to the root of the SD card, insert the card into the board, connect a keyboard and display, and power on. On first boot the board runs the script, creates the directory tree, and reboots into the MiSTer menu.
This step needs a working internet connection — either Ethernet on the board or a supported USB WiFi adapter. Our WiFi adapter is supported by the standard MiSTer Linux image.
Step 4: connect controllers
Plug a controller into USB, then use the menu’s controller mapping screen to assign buttons. The mapping is saved so you do not repeat it.
For low-latency original console controllers, SNAC bypasses USB entirely and connects the original pad to the FPGA. That requires an IO board and an appropriate adapter — see our SNAC vs BlisSTer vs USB comparison.
Step 5: add cores
Open the script menu in the MiSTer interface and run the update script. It downloads the current core set automatically. Individual cores appear as menu entries; each console, computer and arcade system gets its own.
Once cores are installed, run the update script periodically. Cores improve regularly.
Step 6: add games
Games are not distributed with MiSTer. You supply your own ROM and disk images, and the platform expects them in folders named after each core. Copy them to the SD card over the network share (Samba, exposed by the board automatically) or by removing the card.
For best compatibility, keep ROM sets matched to the core revision. Mismatched arcade ROM sets are the single most common cause of a core that will not start.
Step 7: configure video output
Over HDMI, the default settings work on most displays. If you are using a CRT through an IO board, you will need to set the output mode and video timing to match your display. Analogue output requires an IO board — either the Analog IO Board v6.1 or the IO Board A/V Pro v9.2.
Common first-time problems
- Board will not boot. Check the SD card is FAT32 and that the power supply is regulated and adequate.
- Cores crash or behave oddly. Usually SDRAM — either missing, or a module that needs a lower memory setting.
- Controllers not detected. Try a different USB port, and remember the hub needs its own power path on some builds.
- Random crashes during play. Check power and temperature first, not the core.
Frequently asked questions
How long does setup take?
About an hour including downloads, assuming your card is ready and your network works.
Do I need a keyboard?
For the initial setup, yes. Once configured, a controller is usually enough.
Does MiSTer come with games?
No. You supply your own ROMs and disk images.
Do I need to reinstall when I add SDRAM?
No. SDRAM is detected by the cores that use it.
Getting the parts together? See our accessories and expansion boards ranges.
Related reading
Still deciding on part of your build? These guides cover the other choices MiSTer owners face most often.
- MiSTer FPGA starter kit UK — what to buy before you start.
- The best MiSTer cores for beginners — what to play once setup is done.
- MiSTer SDRAM explained: 32MB vs 128MB — which cores need more memory.
- Connecting original controllers to MiSTer — USB, BlisSTer and SNAC compared.
